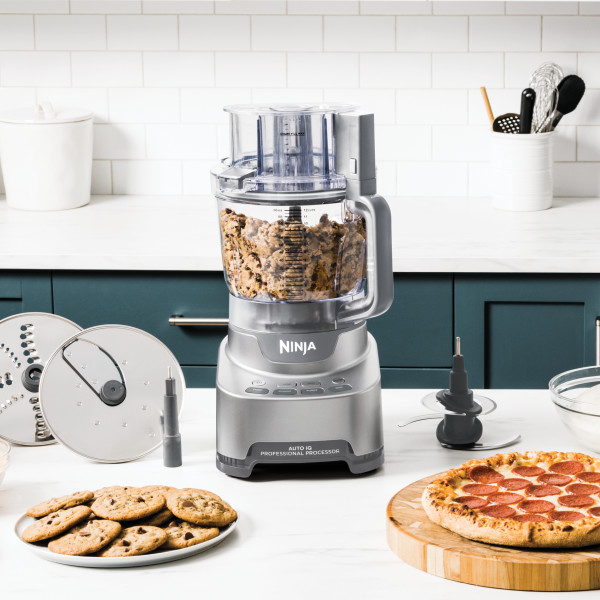
This article contains the FAQs for the NF700 Series Ninja® Professional XL Food Processor. This supports the following product SKUs NF700C, NF700, NF701 and NF702.
How to Operate
Do I need to prep ingredients before processing?
For Using the Discs: if using the small or medium feed chute, trim ingredients to fit the feed chute height. if using the larger feed chute, DO NOT exceed the CHUTE MAX FILL line on the large feed chute. Unit will not run if ingredients exceed this line. Cut both ends off ingredients to create flat surfaces. Trim tapered ingredients like carrots to make them more symmetrical.
For chopping: Cut ingredients to uniform pieces about 2" large and place evenly around the bowl before processing. For best results, make sure ingredients are a uniform size before adding them to the food processor bowl.
How do I use the 3-part food pusher?
The 3-part food pusher separates into small, medium, and large food pushers to guide ingredients through the different-sized feed chute openings. Use the small feed chute opening (which also doubles as a measuring cup) for ingredients like carrots, the medium feed chute for ingredients like cucumbers and zucchini, and the large feed chute for ingredients like potatoes.
As a safety feature, the large food pusher must be inserted in the feed chute for the unit to run. Insert food up to but not above the CHUTE MAX FILL line on the processor lid, then install food pusher to the CHUTE MAX FILL line before selecting program.
Which feed chute do I use?
Using the narrowest feed chute possible allows ingredients to be guided down toward the discs for the most even output.
• To use the largest feed chute, assemble the lid and place ingredients into the chute. Install the largest pusher with the medium and small pusher nested inside to push ingredients through. Large pusher must be installed before selecting a program.
• To use the medium or small feed chute, install the large pusher into the lid and use smaller pushers to guide food through the center of the large or medium pusher.
How do I use the 4.5-Cup Nesting Workbowl?
The 4.5-Cup Nesting Workbowl is perfect for creating smaller recipes. Place the nesting workbowl in the processor bowl with the arrow on the workbowl aligned with the arrow on the processor bowl handle. Place the disc spindle through the opening in the middle and sit it on the drive gear. Then place the small chopping blade over the spindle inside the workbowl. Place ingredients in the workbowl, then place the feed chute lid on the bowl and turn clockwise until it clicks, indicating the lid is locked in place. Press the Power button to turn the unit on. Use Auto-iQ program PUREE or manual programs LOW, HIGH, OR PULSE.
How do I process large quantities for best results?
when slicing or shredding a large quantity of ingredients, process in batches. Remove the disc and spindle, then empty the bowl before ingredients reach the disc. Do NOT continue processing when bowl has filled with ingredients.
How do I clean the unit?
Separate all parts. For hand-washing: Wash processor bowl, nesting workbowl, lid, discs, and blade assemblies in warm, soapy water. When washing the blade assemblies, use a dishwashing utensil with a handle to avoid direct hand contact with blades. Handle blade and disc assemblies with care to avoid contact with sharp edges. Rinse and air-dry thoroughly. For dishwashing: All attachments are dishwasher safe. Ensure the blade or disc assembly is removed from the bowl before placing in the dishwasher. Exercise care when handling blade or disc assemblies. For the motor base: Turn off the unit and unplug the motor base before cleaning. Wipe motor base with a clean, damp cloth. DO NOT use abrasive cloths, pads, or brushes to clean the base.
How do I store the unit?
Wrap the power cord around the cord wrap on the back of the motor base. Store the unit upright and store all blade assemblies inside or attached to their respective containers with their lids locked in place. DO NOT stack items on top of the containers. Store any remaining attachments alongside the unit or in a cabinet where they will not be damaged or create a hazard.
How long will the manual Low and High speeds run?
The Low and High functions will run continuously for 60 seconds.
How do I chop small quantities of ingredients?
For smaller quantities, we recommend using the 4.5-Cup Nesting Workbowl (not included with all models). The 4.5-cup Nesting Workbowl is compatible with all NF700 Series models and it can be purchased from ninjakitchen.com.
Settings
When should I use the LOW setting?
Best used with the disc assemblies or dough blade. Use to make delicate recipes with full control over speed.
When should I use the HIGH setting?
Use only with the chopping blade in the Precision Processor Bowl or with the small chopping blade in the 4.5-Cup Nesting workbowl. Use to make purees, dips, sauces, or recipes that need to be broken down finely.
When should I use the DISC setting?
Use with the disc spindle and disc assemblies only. Best for slicing or shredding various ingredients in the Precision Processor Bowl.
When should I use the PULSE setting?
Use with the chopping blade or dough blade in the Precision Processor Bowl. Use in the 4.5-Cup Nesting Workbowl to chop smaller quantities of ingredients. It is not recommended for use with disc assemblies.
When should I use the CHOP setting?
Use with the chopping blade and Precision Processor Bowl. It is not recommended for use with the 4.5-Cup Nesting Workbowl.
When do I use the disc spindle?
The disc spindle is used for the disc assemblies and 4.5 -Cup Nesting Workbowl (not included with all models). Place the spindle on the drive gear inside the bowl before assembling other components.
For the 4.5 -Cup Nesting Workbowl assembly , place the nesting workbowl in the processor bowl with the arrow on the workbowl aligned with the arrow on the processor bowl handle. Place the disc spindle through the opening in the middle and sit it on the drive gear. Then place the small chopping blade over the spindle inside the workbowl.
General Questions
Why is the unit pausing?
Some Auto-iQ programs have unique processing and pausing patterns to achieve best results. Once an Auto-iQ program is selected, it will start immediately and automatically stop when processing is complete. To stop processing before the end of a program, press the currently active button.
To process without pauses, use manual programs Low or High for continuous running up to 60 seconds.
Can I crush ice in the unit?
No, this food processor is not designed to crush ice.
What is the difference between a feed chute and a food pusher?
The food pushers double act as smaller feed chutes to help guide ingredients into the Precision Processor Bowl. Use the smallest food pusher to push food, such as carrots, through the small feed chute, which is located inside the medium food pusher. Use the medium food pusher to assist food, such as zuchinni, through the medium feed chute, which is located inside the large food pusher. Use the large food pusher to push food, such as potatoes, through the large feed chute, which is located on the feed chute lid.
The unit is wobbling when mixing dough.
The unit is intended to create a dough ball. It is NOT intended to continuously knead. After dough ball forms, additional kneading should be done by hand on a clean, dry work surface. If the unit moves excessively on the counter, remove the dough ball and knead by hand. We do not recommend running the dough program more than 3 times. Remove the dough once the dough is combined.
My dough is not evenly mixed.
For best results using the dough program, we recommend the following:
For cookies: Add sugars, cubed softened butter, eggs, and liquids (such as vanilla extract), then select DOUGH. Add all dry ingredients and run the DOUGH program again. If more mixing is needed, run on PULSE until combined. Add mix-ins (such as chocolate chips, raisins, and nuts) and PULSE to combine. For very sticky doughs, use a rubber spatula to scrape down the sides of the bowl, and press PULSE or DOUGH to continue combining.
For Pizzas, Pretzels, Bagels & Bread Doughs: Add ingredients in the order listed in the recipe, then select DOUGH. Remove dough ball and knead to combine, if needed.
For Cakes, Brownies, Muffins & Quick Breads: Add sugars, softened cubed butter/oils, eggs, and liquids (such as vanilla extract), then select DOUGH. Add all dry ingredients and run the DOUGH program again. Add mix-ins (such as chocolate chips, raisins, and nuts). PULSE until combined.
For Biscuits, Pies & Scones: First add dry ingredients and cubed cold butter or shorten-ing, then select DOUGH. Add cold liquids (such as cold milk or water) and run the DOUGH program again. Remove dough ball and knead to combine, if needed.
The dough program can ONLY be run 3 times continuously. After running dough program, additional kneading should be done by hand on a work surface.
Why is the display is flashing?
Check that the Precision Processor Bowl is properly secured on the motor base and the feed chute lid is secured on the bowl. As a safety feature, the large food pusher must be inserted in the feed chute for the unit to run. DO NOT exceed the CHUTE MAX FILL line on the large feed chute. The unit will not run if ingredients exceed this line.
Why is the dough program flashing?
The unit is designed to run the dough program no more than 3 times in a row. The unit is not intended to continuously knead. Remove the dough from the bowl, and knead by hand. Unplug the unit and let cool for 15 minutes.
Can I grind or mill in this unit?
The Ninja Professional XL Food Processor is not intended to grind or mill ingredients into flour. Do not attempt to dry blend and always add liquid to recipes.
Why are my ingredients unevenly chopped?
For best results when chopping, cut ingredients to a uniform size and don’t overfill the bowl. For smaller quantities, use 4.5-cup Nesting Workbowl (not included with all models).
Why are my ingredients unevenly sliced?
For best results when using the reversible slicing/shredding disc (not included with all models) or adjustable slicing disc (not included on all models), trim ingredients to a uniform size. For the most even results, place ingredients in the smallest possible of the 3 feed chutes. For the small and medium feed chutes, do not cut ingredients smaller than the feed chute height.
What is the easiest way to remove my unit from the countertop for storage?
Reach underneath the back of the unit to tilt the entire unit forward to disengage the back suction cups and then lift the unit off of the countertop.
Assembly
How do I assemble the food processor with the blade assembly?
1.) Place motor base on a clean, dry, level surface such as a countertop or table, then plug in the unit.
2.) Lower the Precision Processor Bowl on the motor base and rotate clockwise until it clicks into place.
3.) Exercising care, grasp the Chopping Blade Assembly or the Dough Blade Assembly by the top of the shaft and place it onto the drive gear inside the bowl.
4.) Add ingredients to the bowl, making sure not to exceed the Max Fill line.
5.) Place the feed chute lid on the bowl and turn lid clockwise until it clicks, indicating it is locked in place. You can then power on the unit and select a manual or Auto-iQ program.
How do I assemble the food processor with the accessory disc?
1.) Place motor base on a clean, dry, level surface such as a countertop or table, then plug in the unit.
2.) Lower the Precision Processor Bowl on the motor base and rotate clockwise until it clicks into place.
3.) Place the disc spindle onto the drive gear inside the bowl. Hold the plastic center of the disc and place it over the spindle. Please note, if using the reversible discs, choose desired side and place facing up before putting on disc spindle. If using the adjustable slicing disc, choose your desired thickness and make sure the disc is not on the S (Storage) setting.
4.) Place the feed chute lid on the bowl and turn lid clockwise until it clicks, indicating it is locked in place.
5.) Press the Power button to turn the unit on, then select DISC or LOW. Add the prepped ingredients you want to slice or shred through the feed chute on the lid. Use the food pushers to help guide the ingredients through the feed chute.
Why can't I install the lid on the bowl?
If any components are misaligned, the lid will not install properly. Make sure the disc spindle and discs or blade assembly are fully seated on the drive gear inside the bowl. Place the lid on the bowl, then rotate the lid clockwise until it locks into place. Make sure the button of the lid has not been pressed.
Slicing Disc
How do I use the adjustable slicing disc?
Use the dial on the disc to select the desired thickness (0.3–8mm). Then use plastic grip to carefully place disc over disc spindle. Ensure disc is NOT on the S (Storage) setting before installing it. Return disc to S position after use.
How many settings are there on the adjustable slicing disc?
The adjustable slicing disc has 8 main settings with 1/3-mm micro settings between each (for a total of 24 individual settings) ranging from 0.3mm to 8mm. See the recipe Inspiration Guide for more information on the different settings.